Pages

Thursday, December 9, 2010

Red Velvet Cupcakes


Hotdog! Today I was feeling 'christmasy' while I as in the mall hearing Christmas songs! To go with the holiday season and yuletide spell, I decided to make bright red vanilla cup cakes. These are simply known as Red Velvet Cupcakes and topped them with cream cheese frosting.

I actually have been thinking of baking something over the weekend but only found time today. I picked up  ideas on how to make these cupcakes while browsing through a couple of cookbooks at Chapters but I edited the version to suit my taste.


Before we move on to the actual recipe, here is a brief introduction on these cup cakes.. These adorable red cakes were made famous by Waldorf-Astoria Hotel in New York back in the early 1920's. Some recipes I've seen pair this with butter cream frosting but for me cream cheese frosting is the ultimate topping to this elegant cup .cake.

This cup cake has a mellow hint of chocolate but it should not taste like chocolate cake. It is in fact a plain cake but made gorgeous by the red food color and by the hint of darkness cocoa gives. You may be surprised that my cake recipe does not use butter but truly I tell you canola oil works magic when making cupcakes. Butter dries out cakes fast but oil gives moisture. So here goes. I hope you enjoy making them but most especially eating them!


For the cake:

2 1/2 cups all purpose flour (when measuring flour don't scoop from the bag or container. But pour flour it into the cup. This ensures you do not have too much flour than what the recipe requires).
1 1/4 tsp. baking soda
1 1/4 tsp. salt
1 Tbsp. dark unsweetened cocoa
1 1/2 cup canola oil
1 1/3 cup sugar
1 1/4 cup butter milk
2 large eggs
4 tsp. red liquid food color
1 1/4 tsp. white vinegar
2 T vanilla
1/8 cup water


Directions:

Preheat oven to 350 degrees.

Line cupcake or muffin pans with cupcake tins. Set aside.

In a smaller bowl, sift together the flour, baking soda, salt, cocoa. Set aside.

In a bigger bowl, whisk together oil, sugar, and butter milk until combined.

Add in the eggs, vinegar, vanilla, water and the red food color.

Mix the dry ingredients in three parts and stir until combined.


Pour mixture in prepared cupcake pans.


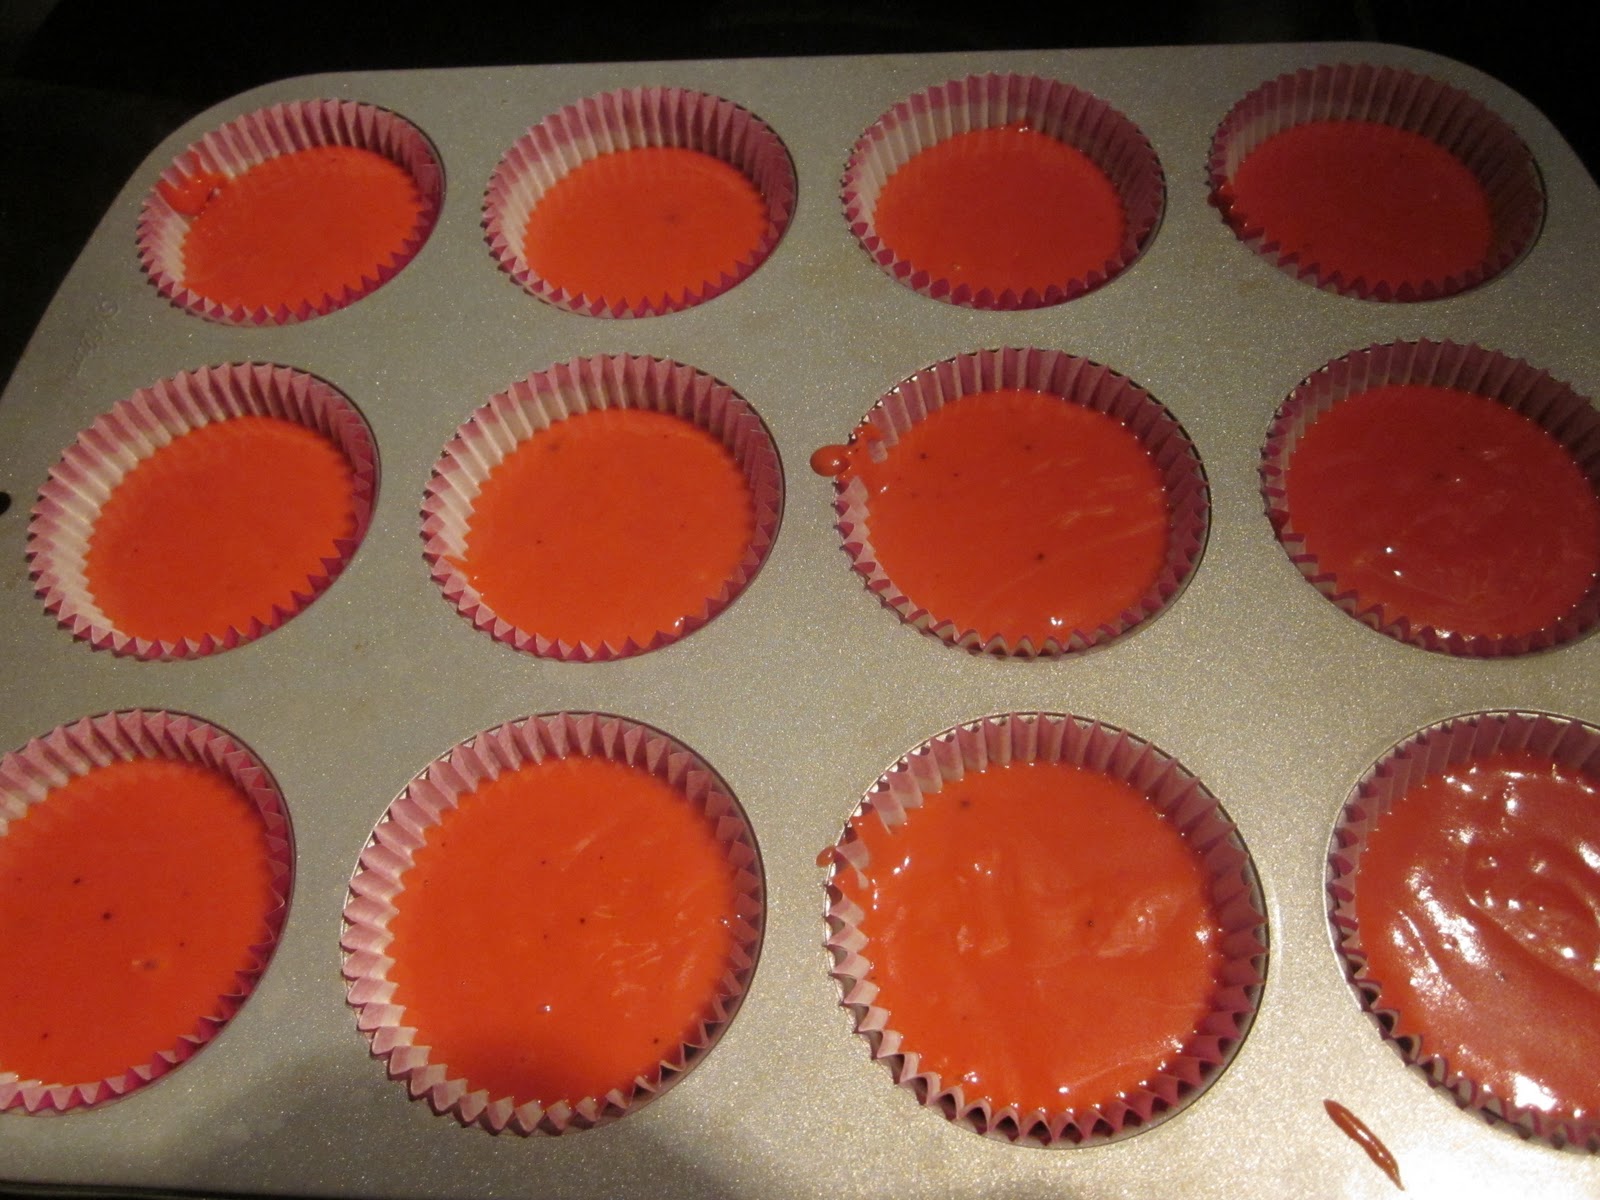
This recipe yields 22 - 24.

Pop it in the over and bake for 22 - 25 minutes or until a cake tester or knife comes out clean.

Remove from oven and let it cool before frosting.


Pipe icing into the cupcakes but leave room for the cupcakes to be visible as it creates a great contrast to  the white icing.


Cream cheese frosting:

1 8 oz, Philadelphia cream cheese
1/2 cup unsweetened butter, softened
salt to taste
1 1/4 cup confectioner's sugar
2 tsp. vanilla

Directions:

Cream together cream cheese, butter and salt with a hand mixer. Add in the confectioners sugar and vanilla. Beat until light and fluffy.

Pour inside a piping bag or sandwich bags. An easy way to fill the bag with frosting is to use a tall glass and line it with the piping bag or sandwich bag. Using a spatula add in the frosting. Place in the fridge for a few minutes to cool before icing the cupcakes. Cut one end of the bag before frosting.


Sunday, November 28, 2010

Baked Sole with Barley Vegetable Brunoise


I served this dish as a main entree when my Mom came for a visit. This post is basically a combination of two recipes, the fish and the barley. I decided to write both recipes in one post since they pair so well.

This recipe is a charmingly simple dish but flavourful and tasty. My recipe was adapted from Food Network's Chuck Hughes. However I adjusted mine to keep up with the availability of ingredients I had from my own pantry.

The fillet of sole was placed over a bed of barley brunoise. Barley brunoise may sound glamourized but actually it's not. Barley is a cereal grain when cooked has a pleasant chewy, pasta-like consistency. Brunoise because the vegetables added to the barley was cut into very fine small cubes. It is a culinary knife cut where you julienne food and dice it into small cubes usually 1 to 3 mm small. When making this dish, it's important that the vegetable cut is consistent in size and shape since it creates a pleasing presentation.


Barley is an everyday twist you can feed your family, a side you can bring to picnics, and a good alternative to potatoes, rice or pasta.

For the filet of sole 

4 filets of sole
tablespoons canola oil
salt and pepper

For the mustard sauce 
tablespoons butter
3 tbsp. olive oil
shallots, minced
tablespoons caper, minced
2 tablespoons coarse grain mustard
1/2 cup water
salt and pepper

For the barley and vegetable brunoise
tablespoons butter
1 cup barley
1 onion, diced
1 clove garlic, minced
1 1/4 cup carrot, diced
1 red or yellow pepper, diced
2 stalk celery, diced
1 chicken cube

Directions for the filet of sole:


Preheat oven to 350 degrees F.

Line a baking tray with parchment paper. Place sole on the tray and season both sides with oil, salt and pepper.  Cook in the oven for 8 minutes or until the fish is cooked.


Directions for the mustard capers sauce

Bring pan to medium high heat. Add olive oil. Saute the shallots until it becomes transluscent. Add capers, mustard and water. Bring to a boil and reduced by half. Add butter and whisk until fully incorporated. Season with salt and pepper.

Barley and Vegetable Brunoise

Cook barley per package instructions. Rinse barley in water and drain. Mix 1 cup of barley with 3 cups of water and bring to a boil. Once it has boiled, reduce to medium to low heat and simmer until the barley is tender and cooked. Set aside.

Bring a large pan into medium high heat. Add the butter and saute the vegetables for about 10 minutes. Add barley and the chicken cube. Season with pepper. Mix well. Cook mixture unil veggies are soft in  consistency.


Serve by plating barley topped with the sole filet and garnish with the sauce.

Garlic Soup and Artichoke Crouton


My Mom came for a visit and I decided to cook something special for her.  I decided to create a dinner by adapting from Chuck Hugh's recipe. As a starter, I made garlic soup topped with artichoke crostini. For the main entree, I made baked sole with capers and mustard sauce paired with barley brunoise. Truly this made my Mom smile and it's better than dining out!

Here is a recipe for the garlic soup. This soup has such beautiful richness that a small serving is good enough to satisfy your guests. Beware! this starter will create high expectations and keep your family thinking you're a kitchen genius.


Serves 4
For the garlic soup:

2 large galirc head cut in half (use the largest you can find)
3/4 cup olive oil
2 tbsp. flour
3 cups chicken stock ( I made my own by boiling uncooked chicken bones).
2 sprigs of fresh thyme
salt and pepper

For the artichoke crostini:

1 can artichokes
1/4 cup olive oil + 2 tbsp
1 shallot, sliced
half a bunch of parsley, chopped
8 thick sliced of crusty bread
200 grams mild cheddar cheese
salt and pepper

Directions for the garlic soup:

Pre-heat the oven to 350 degrees.

In a small pan, pour the olive oil and place each half garlic head facing flat in the oil.


Roast the garlic in the oven for about 40 minutes or until the garlic is soft throughout and nicely browned.


Remove from the oven and let it cook for awhile before you remove the skins from the garlic. Remove half of the oil and set it aside (this half will be used for the croutons). Mash the garlic in the remaining oil.


In a pan over medium high heat add the mashed garlic and its oil. Add the flour and cook for 2 minutes.


Add the chicken stock and thyme, bring to a boil and then let simmer for 15 minutes until the soup achieves a nice soup consistency. Season with salt and pepper.


Direction for the artichoke crostini:

Artichoke Croutons

Bring a pan to medium high heat and pour 2 tbp. olive oil. add the artichokes and shallots.  Sautee until the onions caramelized. Add in the parsley. Saute. Season with salt and pepper. Set aside.


Preheat oven to 350 dregrees.

Brush the bread slices with the garlic infused olive oil ( lots of it). In another pan, bring it a medium high heat and add bread slices. (If there are remaining garlic infused oil, add it in the pan).  Brown the bread slices until the exterior turns crunchy golden brown. Remove from pan.


Top the bread slices with the artichoke topping and cheese. Pop it in the oven for a few minutes until cheese is melted.


Brush the slices of bread with the remaining garlic infused oil, garnish with the sauteed artichoke and cheese. Grill in the oven until the cheese is melted and slightly golden brown.

When ready to serve, place a small amount of soup and top it with the artichoke crouton.


Enjoy!

Tuesday, November 23, 2010

Vanilla Bundt Cake


Tis’ the holiday season and kitchen disasters are just around the corner. Unfortunately, I had one when I decided to make a Bundt cake as a gift for some VIPs :). Later on I found out that it was undercooked and overly sweet to the liking of the gift recipients :(. Now every time I get home from work I would bake a Bundt cake because I really want to perfect the recipe and never again give something that awful! Here I am back at blogging because I have made a success trying out  variations of a recipe I have been playing with the last few weeks. I adapted the recipe from King Arthur Flour’s Lemon Cake but this time I tweaked it a bit to suit my taste. Instead of a lemon cake I made vanilla bundt cake and added additional butter to it. After countless disasters, now I have my own recipe to keep. Hopefully the next time I give this as a gift, it’s a perfect ten.

Trust me, I’ve tried a lot of variations for the last few weeks. I was only able to jump and say ‘Eureka’ yesterday! But first let me tell you the misfortunes I’ve been through.  I played around with the type of flour to use. I tried all-purpose flour and the cake came out floury in taste, too dense and not at all buttery. I then tried unbleached flour  and it came out too crumbly. But the one thing that ultimately worked for me is cake flour. I guess it was a no brainer to use cake flour since I am making cake. But you can’t blame me for trying different types since as a cook you want to try out the possibilities out there and if possible make substitutes to the recipe. But one humbling thing I learned from baking cakes is never underestimate the science in it. Unlike cooking where substitutes are possible, baking is a totally different arena. Measurements are needed and using the right type of ingredients are a must.


I also encountered the cake sticking to the Bundt pan. So I did research and figured that by using non-stick spray and sifting a bit of flour into the pan works best. This avoids the cake from sticking to the ringed, fluted, grooved pan. Not to say the least, another disaster I had was when I turned it upside down, the cake was sliced into two! If I had glue I wish I could have salvage it but too bad I cannot.

BTW, the best time to turn the pan upside down and remove the cake from the pan is  10 minutes after removing the cake from the oven.  If you let it stay there too long you have the chances of the cake sticking to the pan. While if you do it right away there’s a possibility that the  cake will be cut in half.

Chances are everyone will have different experiences when baking something (due to the type of oven we use, the type of pan, the virtue of patience one has). But I have been making the same recipe below for the last 2 days and all I can say is that it’s perfect. I brought them to work and left them at the pantry. They were wiped out in a flash! I had to check the garbage bin to see if it was a hit or miss but indeed this recipe satisfied everyone..because the first time I made it I saw 2 pieces thrown into the bin :). No need to ask just check the bin!

Now a days, cakes are getting fancier and fancier. Am not going to be surprised if the next fad is a cough syrup cake (LOL!). But as always in me, I want to go back to the basics first and perfect something before I move on to greater things :). Also I want a recipe that I can keep and pass on to my loved ones. (Here it is Mom!) a classic Bundt cake. You can’t go wrong giving this as a gift for the holiday. Young and old will like it and it can be made into many varieties like a marble cake, lemon poppy seed cake, rum cake or whatever you fancy. I am currently experimenting on a marble cake so the recipe should follow later on :)

Now bring it on!

For the cake:
3 cups, all cake flour (no compromise)
1 tsp. salt
2 tsp. baking powder
1 ½ cups unsalted butter, softened 
2 cups granulated sugar
3 T pure vanilla extract
4 large eggs, room temperature
Confectioner’s sugar for dusting

Directions:

Grease a 9 – 10 cup non-stick Bundt pan with cooking spray


Pre-heat oven to 530 degrees.

I used a hand mixer to combine the ingredients.

In a small bowl, scoop cake flour into the measuring cup (not the other way around). This will ensure you have just the right amount of flour and do not add too much flour into your batter.  If you scoop flour using your measuring cup chances are you are adding too much than what the recipe calls for.

Add in the baking powder and the salt. Set aside.

In a bigger bowl, add the sugar and butter together. Beat until light and fluffy. Stir in the vanilla.

Break each egg and add one. Mixing at to ensure they are incorporated well.


Pour in the flour  and the milk alternately. Starting with the flour and end with flour.


Pour the batter in to the greased pan carefully.

Place at the center of the oven rack and bake for 50 – 60 minutes or until the cake tester comes out clean. 

After 10 minutes, place a plate on top of the cake pan. Turn it upside down and tap on the cake pan. Gently pull out the pan. Voila...you have yourself a bundt cake.

With a sifter dust powdered or confectioner's sugar on the cake. Slice and enjoy!


Thursday, November 18, 2010

Fried Green Tomatoes


If you are a child of the 80's (like me!) then you would popularly call in mind 'Fried Green Tomatoes'  as the movie that starred Mary Stuart Masteron, Mary-Louise Parker and Kathy Bates instead of referring to the delicacy in the deep south. This chick flick was pretty popular back in the early nineties right :)? Am not sure if it appeals to the new generation but the drama, comedy and the twist in the story on what really happened to bad Frank is pretty gritty. I have watched the movie more than twice and movies filmed in the old south (not only the food) has appeal to me.

Anyway, since this is a food blog and not the rottentomatoes.com review site, the movie has to take a backseat for now. Let us make tomatoes the protagonist this time!

Green tomatoes are common in the summer and will not be readily available in the local supermarket at this time of the year. However, I knew I still had to go to St. Lawrence Market in case I am lucky. My positive thinking did pay off. I did get them but not easily.  I talked to a vegetable lady to get me some unripened tomatoes. Luckily she was very helpful and we both dug up around the pile of vine ripened red tomatoes ( a certain type of tomato variety) and found some green ones sticking out from the red clumps. I was pretty happy myself to get me four, good, green, hard tomatoes.  I went home happily carrying my produce and was excited to cook and munch on some of these tangy, sweet and crispy goodness :)

After frying, I drizzled them with honey and topped with sour cream!


For the fried green tomatoes

4 medium to large unripened tomatoes (vine ripened tomatoes variety)
1/2 cup flour, season with any dry spice you have or prefer. ( I used chipotle pepper, paprika, chili and garlic powder).
2 eggs, beaten
1/2 cup milk
1 cup fine bread crumbs
canola oil for frying
salt and pepper
sour cream
honey

Direction:


Wash tomatoes and sliced into 1/4 inch think. Pat dry. Season with lots of ground black pepper.

In a bowl beat eggs and mix in milk. Prepare wide mouth bowls and add in the flour in one bowl. Scoop the bread crumbs in another bowl.

Individually work on each tomato slice by dipping it in flour. Then dip it in the egg and milk mixture. Dredge it in the breadcrumb mixture. Be gentle when handling the tomatoes so the breadcrumb coating stays.

In a skillet, add the oil and bring to medium high heat. When the oil is hot (not hot enough to burn your coating)  add the coated tomatoes. Fry in batches and do not put them close to each other. When the coating on one side if golden brown, flip and do the same for the other side.

Place the tomatoes in a plate lined with paper napkins to absorb the oil.

Drizzle the fried tomatoes with honey. Serve with sour cream on the side. Enjoy!


Monday, November 15, 2010

Pasta Salad


It's Monday again! Here I was staring at the contents of the fridge after arriving from work, trying to figure out what I can come up for dinner. I wanted to use any ingredients that need to be eaten before anything gets spoiled. I was pondering on making broccoli cheesy bake but wanted to use the cheese I had for another recipe. I decided to come up with an easy pasta salad that was not heavy, nor cheesy but healthy. Pasta is not all about loading it with cheese. In lieu of it, I used toasted bread crumbs to add some flavour to the dish. This pasta salad can be eaten hot or cold which ever way your prefer it.
For the pasta ingredients

1 lb. pasta, cooked according to to package instructions
1/2 lb broccoli, sliced
1/4 lb cauliflower
8 sun dried tomatoes, sliced thinly
6 garlic gloves, minced finely
2 tsp. dried chili flakes
2/3 cup olive oil
1/3 cup panko bread crumbs
1 small red onion, chopped
240 grams crab meat (you may use canned salmon)
3 T balsamic vinegar ( don't omit this, its key ingredient to add flavour to this dish)
lots of salt and pepper to taste

Directions

Pre heat oven to 375 degress.

In a baking sheet add panko bread crumbs.


In a bowl, combined brocolli, cauliflower, sun dried tomatoes, onions, chili flakes, ground black pepper and 1/3 cup of olive oil. Mix until the olive oil coats the vegetables. Transfer to a baking sheet.

Pop the panko in the oven and the vegetable mix. Bake the bread crumbs for 5 minutes or until gold brown. Bake the veggies for 10 minutes.

In a large bowl, add the pasta. Pour in the veggies and mix well. Season with  lots of salt and pepper to suit your taste. Add the balsamic vinegar and the the remaining 1/3 cup olive oil. Mix in the crab meat gently.

Topped with panko bread crumbs. Enjoy!

Friday, November 12, 2010

Soft Chunky Chocolate Macadamia Cookie


There are a million and one chocolate chip cookie recipes out there. This is
actually not a cliche but a reality to many bakers. The information overload  from the Internet and the lure to try new recipes from new cookbooks makes one confused what recipe to use and hold on to. Everyone has the quest for the best chocolate chip cookie.

If there is one recipe I always refer to, it's the Toll House recipe you find printed at the back of the yellow Toll House chocolate chip bag. This is known as 'The Famous Toll House Cookie Recipe'. It's a classic recipe that goes way back in 1930 when Ruth Wakefield the owner of the Toll House Inn in Massachusetts  invented this recipe.  Nestle heard about this famous cookie that makes use of their chocolate chips and the rest is history. They bought the rights to the recipe and the Toll House name.

For me, it's a no brainer to use this recipe, even though there are a million other recipes out there. It's tried and tested. And Nestle which I believe spends a lot of money on research and development (creating recipes for their products), would not print this at the back of their packaging if this recipe does not work. They should have replaced it but they have not. 

I hold on to just this recipe and treat it like my own. This recipe is a keeper. For me the quest for the best chocolate chip cookie ends where it all began - from Ruth Wakefield herself. Of course, I modify it to suit my preference, like using chunky chocolate instead of the morsels, always adding more vanilla than the recipe asks and taking the nuts a notch higher by using macadamia.


For this recipe since I used chunks, I bought Callebaut chocolate from Bulkbarn.

Makes 35 cookies

For the cookies:2 1/4 cup all-purpose flour
1 tsp. baking soda
1 tsp salt
1 cup butter (2 sticks) unsalted butter, softened
3/4 cup packed brown sugar
3/4 cup granulated sugar
2 large eggs
2 cups (12 oz. bag) Toll House Chocolate Chip Cookies or Chunky chocolate, bittersweet
Recipe asks for 1 tsp. vanilla but added 3 1/2 teaspoons
1 C chopped macadamia

Directions

Pre-heat oven to 375 defrees.

In a small bowl, combine flour, baking soda and salt. In a large mixxing bowl, beat butter, sugar, brown sugar, and vanilla extract until light and creamy. Add room temperature eggs one at a time, mixing the mixture well after each addition. Then gradually add in dry ingredients ( flour mixture). Stir in the chocolate and the nuts. Mix well.


Spoon each table spoon cookie into an ungreased sheet. Leave an inch space to give each cookie room. Bake for 9 - 11 minutes or until golden brown. Mine cooked exactly at 9 minutes. Leave in the tray for 2 minutes and transfer to a cooling rack.


Thursday, November 11, 2010

Anchovies and Aioli Linguini


Creating a pasta dish goes back to basic ingredients.


Today, I decided to make pasta with Aioli as my base. Aioli is a type of sauce made from the versatile olive oil and ever present kitchen herb, the garlic (debate whether garlic is an herb or not is open for discussion :)). The most traditional Aioli is Catalonia's version (a province in Spain). It only makes use of three ingredients: Salt, Garlic and Olive Oil. Catalonioan's actually call it Allioli (translated as garlic and oil). However, there are other versions like the one in France where egg is added to the mixture so it becomes a mayonnaise like emulsion. 

This article is basically a combination of two recipes. The allioli and the pasta. The pasta recipe is a simple but satisfying one dish meal. 

I decided to go for the traditional style Aioli since I still had energy to grease some elbows after coming home from work. So with the help of a mortar and pestle, I journeyed on to being a mechanical machine, getting my hands at work while I watch tv.


Of course, if one does not have the time, the blender is always handy. Anyway the results are the same when heat is applied to it in the pan. However, you can refrigerate the Allioli. Later one, you may combine it with chopped herbs which makes a good rub for pork chops, beef, chicken or topped over veggies. While if you simply beat in 1 whole and 2 egg yolks in the mixture you can make yourself a special homemade mayonnaise and use it as a dip or a spread over a tired looking sandwich.


For the Allioli    

1/4 tsp. rock salt
3 cloves large garlic
1/3 plus 3 T extra virgin olive oil


Directions


With a mortar and pestle, pound the garlic and remove the skin. Add the rock salt and continue to crush the garlic until it becomes a paste. The garlic should be grounded thoroughly without any tiny bits remaining.


With a paste like mixture, start adding, drop by drop the olive oil while you continue mixing the garlic paste. A good technique is to stirring the paste with one hand while the other hand pours in tiny drops or thin ribbons. Small quantities should be added gradually. Do not add large quantities or else the mixture will not emulsify. Once the last drop is added continue to mix to ensure the consistency of the paste remains and the oil does not separate from the mixture.


For the Pasta

5 T of the Allioli paste (if you are not planning to use allioli paste, make sure to add more garlic when it is sauteed in olive oil)

80 grams anchovies, chopped ( you can add more if you want more anchovies flavour)
1 1/2 cups sliced tomatoes ( I used grape tomatoes, sliced in the middle)
bunch of curley leaf parsley, chopped roughly
freshly ground black pepper
juice of half a lemon
1 whole egg and 2 egg yolks, beaten
1/3 cup freshly grated parmesan cheese
1/3 cup olive oil, to top over the pasta at the end 
1 pound pasta, cooked according to package instructions


Directions

Begin by bringing pasta to a boil. Once pasta is being cooked, bring a large pan into medium heat. Add the allioli paste. Saute. Mix in the anchovies and saute lightly. Add in tomatoes followed by the freshly cooked pasta noodles cooked al dente (Do not add the pasta water). Saute. Toss in the parsley and add a dash of ground black pepper. Saute. Pour in the lemon juice. Mix well.


Remove from heat. 


Mix the beaten eggs and the cheese together. Pour the egg mixture into the pasta. Ensure that it is not too hot because it might cook the eggs mixture. Mix the pasta right away to incorporate the eggs and cheese into the noodles. The right texture is a silky.


Pour in the olive oil and toss the pasta. 

Wednesday, November 10, 2010

Cha Gio: Fried Vietnamese Spring Rolls


Fried Vietnamese spring rolls are a favorite of mine. Unlike the typical pork spring rolls or egg rolls usually found at Chinese fastfood chains, Vietnamese spring rolls are slightly different. They differ in the type of wrapper used and the filling. Cha Gio as they are commonly called back in Vietnam makes use of  rice paper wraps and  taro is added in the pork mixture. A mixture of sweet fish sauce is also used as a condiment on the side.


Wrapping with rice paper is delicate but once you get used to working on it, its as easy as ABC! When Chao Gio is fried, they are ugly ducklings compared to their smoother Chinese counterpart (no pun intented) but they make an authentic and unique type of spring roll. If you happen to visit an authentic Vietnamese restaurant I highly suggest you try fried spring rolls instead of the fresh ones.


For the spring rolls

450 grams lean ground pork
325 grams raw shrimp, peeled and chopped
2 eggs
4 shallots
1 1/2 cup carrots, finely diced
1 1/2c dried ear wood mushrooms, soaked in warm water and thinly sliced
1 extra large taro, peeled and grated. Choose the kind that is slightly white on the inside than the purple kind
200 grams, celophane noodles, soaked in water and chopped about 1 1/2 inch long
2 T. fish sauce
1/4 t. salt
1 T soy sauce
Black pepper
Canola Oil for frying
25 - 30 pieces rice paper wraps


Directions


In a big bowl, combine the pork and shrimp. Make sure they are mixed throrougly. Add in the eggs, chopped shallots, carrots, mushrooms, taro and mix again until well combined. Next, add in the cellophane noodles, fish sauce, salt, black pepper. Mix until all ingredients are incorporated well. Set aside.


Prepare a wide-mouth bowl and add luke warm water. Lay out your wrappers and individually dip them in water for about 20 seconds. Transfer the wrapper into a the mat and wait for it to soften. Scoop out the pork filling and place it in the middle on one side of the wrapper. Fold the wrapper that is closest to the filling and press down slightly to tighten the roll. Fold over both sides. Make sure the sides are folded straight and not slanted to avoid making the middle section thicker than the sides. Rice paper burns easily and if they are not folded properly the sides will brown easily. Continue to roll up while holding the sides until the end of the wrapper. Tuck in the sides after. Rice paper tend to stick to each other, when you align them make sure to put a space in between each other.


In a pan add oil enough to fry the rolls. Bring the heat to medium high heat and add the rolls carefully. Space the rolls from each other. Rice paper are very sticky when they are fried. Then bring down the head at medium high to avoid burning them and turn occasionally until light brown. Make sure your attention is at frying since rice paper in high heat burns easily. Once cooked place them in a plate lined with paper towels to absorb the remaining oil.

For the dipping sauce

6 T sugar
3 T vinegar
1/4 C. fish sauce
1 1/4 cup warm
a dash of dried chili flakes or 1 minced bird's eye chili
half a carrot sliced thinly


Directions

Combine all ingredients together until the sugar has completely dissolved.